The Thames Path North Bank
Other Links >>> |
|
THAMES PATH - NORTH BANK Part 2
Wandsworth to Greenwich
|
|
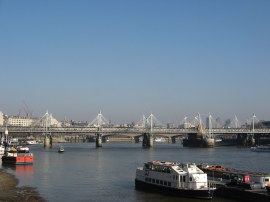
The Thames Path North Bank |
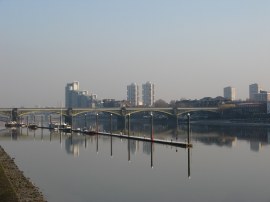
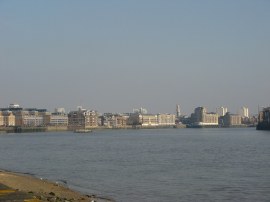
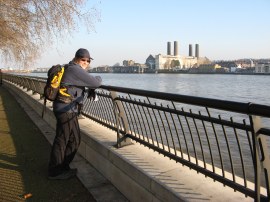
Between Teddington and Greenwich the Thames Path runs along both the South and North banks of the river. For our main walk myself and Sara walked along the south bank of the river which is the route the old towpath took out of London and also has generally better access to the waterfront. However having completed the main path we also decided to walk the North Bank stretch of the path through London. Back in December we had walked the first part of the path along the north Bank between Teddington and Wandsworth and were now back on an extremely cold, but bright sunny February day to walk the remaining 14 or so miles from Wandsworth down to Greenwich.
 |
 |
 |
(1) View towards Battersea Railway Bridge |
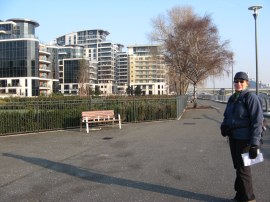
(2) Imperial Wharf |
(3) Approaching Chelsea Harbour |
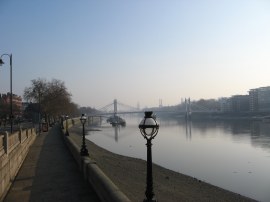
I took the train over to Wandsworth Town Station before walking over to Wandsworth Bridge where I met up with Sara, who had managed to find a geocache while crossing the bridge, where we had last left the North Bank path. The route leaves the river briefly at the bridge, heading down Townmead Road for a short distance before heading to the right, across the middle of a Sainsbury's car park, to rejoin a waterfront path from where there were views downstream towards the Battersea Railway Bridge, photo 1. The path heads alongside the new housing of the Imperial Wharf development, photo 2, before passing under the rail bridge to head by the buildings of Chelsea Harbour, photo 3, complete with a small yacht basin of the same name.
 |
 |
 |
(4) View down to Battersea Bridge |
(5) Chelsea Embankment, nr Battersea Bridge |
(6) Thomas More statue |
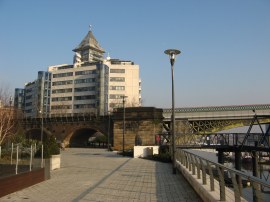
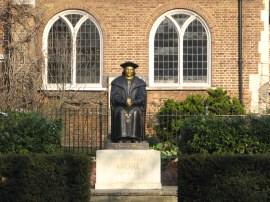
From the Chelsea Harbour there were good views through the misty morning sunlight down towards the Battersea road bridge, photo 4, however leaving the development the route has to head inland to cross over Chelsea Creek and then joins Lots Road, running alongside the large brick building of the Lots Road power station. The power station, which supplied power to the London Underground, closed in 2002 and is now awaiting re-development into houses and shops as has happened to the similar plots nearby that we had just passed. Reaching the end of Lots Road the route rejoins the river bank at Cheyne Walk where there were a number of large houseboats moored besides the bank. The North Bank path then follows the road running alongside the river more or less all the way to the Houses of Parliament. Reaching Battersea Bridge the route continues ahead along the Chelsea Embankment, photo 5. The embankment road was built upon the top of the main low-level interceptor sewer taking waste water from west London eastwards towards Beckton which in part explains the long stretch of waterfront path alongside the busy road. As we headed down the road we passed the statue of Thomas More outside the Chelsea Old Church, photo 6.
 |
 |
 |
(7) Battersea Power Station |
(8) Pimlico Gardens |
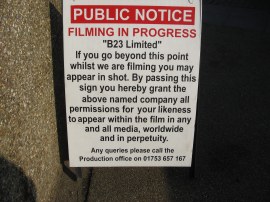
(9) Filming Notice |
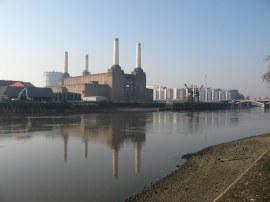
Continuing on, the path passes the Albert Bridge, which had been re-opened to traffic since we had walked down the south bank path back in September although the haze and low sun made it impossible to get a decent photo. The embankment heads past the Chelsea Physic Garden and then the Royal Chelsea Hospital, home of the Chelsea Pensioners before reaching Chelsea Bridge where the road becomes Grosvenor Road. Chelsea Bridge was almost immediately followed by the Grosvenor Rail Bridge, which carries the lines out of Victoria Station and on the opposite bank Battersea Power Station, photo 7. Running alongside Pimlico the route leaves the road to make the merest of detours around Pimlico Gardens, photo 8, where there is a statue of William Huskisson renowned for being the world's first railway casualty having been run over by George Stephenson's Rocket. Back on the pavement we followed the road up Vauxhall Bridge, another short stretch of waterfront path being closed off for maintenance. We then headed to our left along the approach to the bridge before heading down some steps to the river. Here we were greeted by the sign in photo 9 regarding filming that was taking place. The road between here and Lambeth Bridge, now called Millbank was closed to traffic for the day but fortunately was open to pedestrians and us walkers.
 |
 |
 |
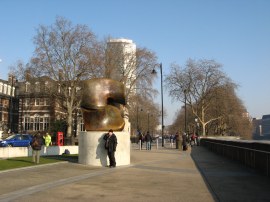
(10) Henry Moore,s Locking Piece |
(11) The Millbank film set |
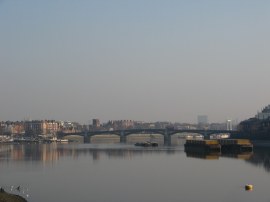
(12) View down to Lambeth Bridge |
Sara stopped to ask what was being filmed and it turned out to be a scene for the James Bond Skyfall film. In seemed a large undertaking with many vehicles and support personnel for what will probably only be a few seconds footage in the finished film. The path heads by the Henry Moore sculpture Locking Piece, photo 10, and then the Tate Britain and Millbank Tower. There were a considerable number of cars stationery in the road and as we were walking down Millbank they all started reversing up the road to regain their start positions for another take, photo 11. Away to our right there were good views down the river towards Lambeth Bridge and the London Eye growing steadily larger in the distance and we also got our first glimpse of the houses of Parliament. The tide had been going out as we were walking down the river, exposing patches of the foreshore alongside the river.
 |
 |
 |
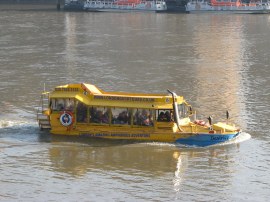
(13) Duck Tours vehicle |
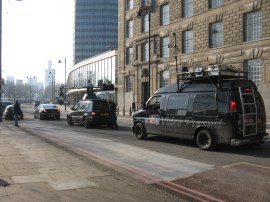
(14) Skyfall Film Crew |
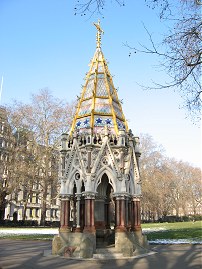
(15) The Buxton Memorial fountain |
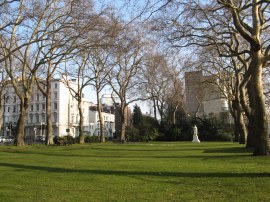
As we were heading down Millbank we also spotted one of the Duck Boats out on the water, photo 13. Approaching Lambeth Bridge we passed the stars in their car, and the last of the camera cars, photo 14, and were asked by one of the film assistants to keep moving as they were about to start filming. From the bridge the path enters into the Victoria Tower Gardens, which provides a rare bit of green space on this walk. The Thames Path then follows the edge of the park, passing the Buxton Memorial fountain, photo 15, as it makes its way towards the Houses of Parliament.
 |
 |
 |
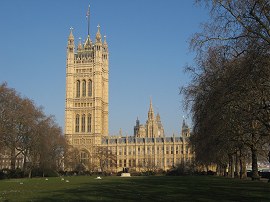
(16) Victoria Tower |
(17) View towards Westminster Bridge |
(18) Westminster Abbey |
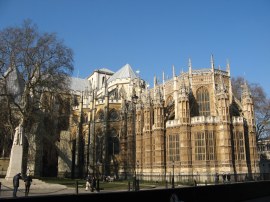
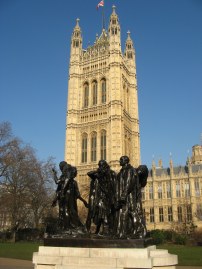
The path then heads off to the left, passing the Burghers of Calais Monument back up towards the road to skirt round the Victoria Tower, photo 16, and the parliament buildings. Down river there were good views down towards Westminster Bridge and the London Eye, photo 17. On the opposite side of the road the path passes Westminster Abbey, photo 18, and Parliament Square where there were still a couple of tents belonging to the anti war protesters remaining on the pavement besides the square.
 |
 |
 |
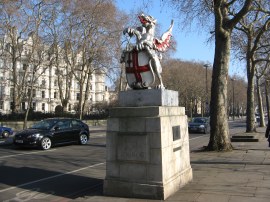
(19) Statue of Richard I |
(20) London Eye |
(21) Hungerford Rail Bridge |
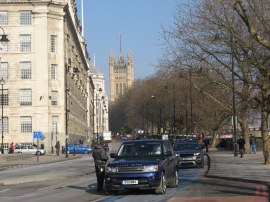
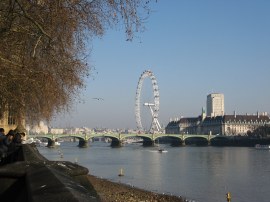
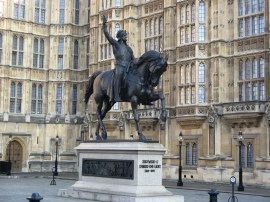
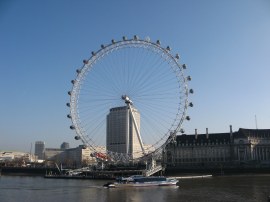
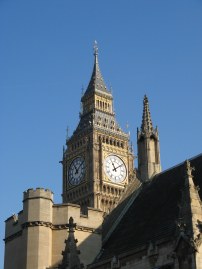
Outside the parliament buildings there were a number of other statues including Oliver Cromwell and one of Richard 1st by Carlo Marochetti, photo 19. We made our way slowly through the throngs of tourists down Bridge Street and past Big Ben before crossing over the road and heading down to rejoin the pavement running alongside the river and the Victoria Embankment. A short distance further on we stopped on a bench opposite the London Eye, photo 20, for a short snack break. Sara had very kindly provided me a packed lunch and I stopped and had a very welcome cheese roll and mug of tea. I had had a few beers the night before hadnt really been up to eating breakfast before I set out, despite not having had any dinner, (I know not good at my age and I should know better), anyway after this stop I felt fully fit and recovered. There is so much to see in this part of London that statues and buildings that would have merited many a photo back out in the countryside hardly got noticed and even then I still ended up taking over 150 photos during the walk. After our break we resumed our walk along the Victoria Embankment as the Thames Path makes its way towards the Hungerford Rail Bridge, photo 21.
 |
 |
 |
(22) Entering the City of London |
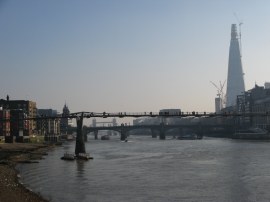
(23) View towards the Millennium Bridge |
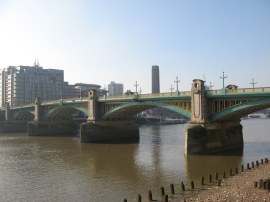
(24) Southwark Bridge |
The path then heads by Cleopatras Needle and on under Waterloo Bridge and a short distance further the route enters the City of London, the spot marked by a dragon on a plinth, photo 22. The path then heads under the Blackfrairs road and rail bridges from where there were very good views down the river from the Millennium Bridge to Tower Bridge along with the Shard rising up away on the right, photo 23.The tide had now turned on the river although there were still a fair number of people out picking through the items on the exposed banks of the river. Having passed under the Millennium Bridge the route detours inland briefly along High Timber Street before heading back down Queenhithe to the river. On the opposite bank of the river we could see the Globe Theatre, still with a little bit of snow on its thatched roof. The route then takes another brief diversion away from the river to head through a passage under Southwark Bridge before heading back down to the waterfront at Three Cranes Walk, photo 24.
 |
 |
 |
(25) Sara, Three Cranes Walk |
(26) Thames Path, Oystergate Wharf |
(27) Tower of London |
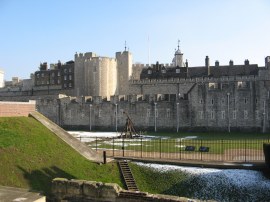
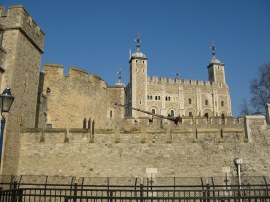
At Blackfrairs Bridge the path had finally been able to leave the road and was now generally running along a more pleasant, and quieter, waterfront footpath, photo 26. The path heads under the Cannon Street Rail bridge and on down to London Bridge. Away to the right a brief gap in the modern office blocks lining the waterfront allowed a view up to The Monument, its gold dome shining in the sun. Reaching the end of Old Billingsgate Walk the route had to head up Water Lane, the path along Sugar Quay Walk being closed, before heading to the right along the last few yards of Lower Thames Street up to the buildings of the Tower of London, photo 27.
 |
 |
 |
(28) Tower of London |
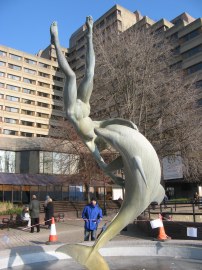
(29) Girl with a Dolphin |
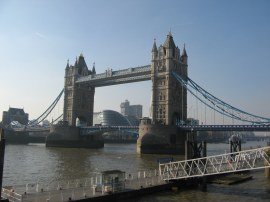
(30) Tower Bridge |
After a brief stop to spend a penny, or more precisely 50 pennies, we followed the path past Traitors Gate and the Tower, photo 28, and then on under Tower Bridge. On the other side the route heads by the Tower Hotel and David Wynne sculpture, Girl with a Dolphin, photo 29. From here there were good views back to Tower Bridge, photo 30.
 |
 |
 |
(31) Entrance to St Katherine Dock |
(32) Tower Bridge |
(33) Dove sculpture by Wendy Taylor |
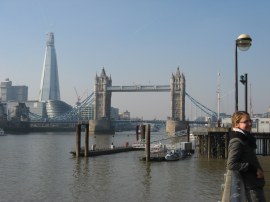
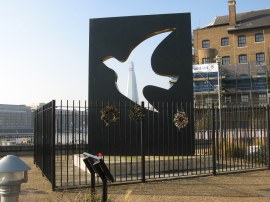
We then headed over a red painted bridge across the entrance to St Katherine Dock, photo 31, before detouring briefly inland to head along a short stretch of St Katherines Way before heading back to a short section of waterside path from where there were more views back to Tower Bridge and the Shard, photo 32. There then follows another very brief diversion up to the road before the path rejoins the waterfront at the small Hermitage Riverside Memorial Gardens where there is a memorial, photo 33, which commemorates the civilians who died in the London blitz.
 |
 |
 |
(34) View down towards the Isle of Dogs |
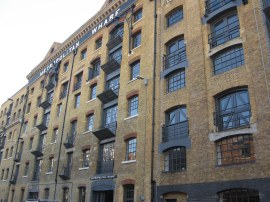
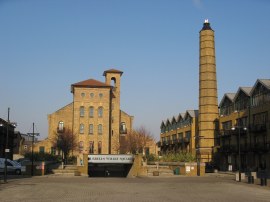
(35) Metropolitan Wharf Building |
(36) Swing Bridge Shadwell Basin |
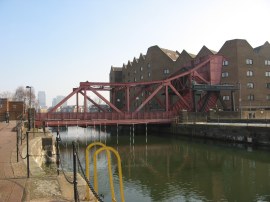
The Thames Path heads through the park, with an mooring of houseboats besides it on the Thames, before heading in front of some modern glass glad housing and back up to join Wapping High Street. Much of the road is lined by tall converted warehouses, the shady street feeling much colder than the sunny waterfront paths. A short distance past the Wapping overground station the route heads through down a passageway and through a gate back to the river from where there were views down the river as it starts its long meander round the Isle of Dogs, photo 34. The route continues on past housing through another stiff gate before heading back up to the road once again, the path soon bearing to the right along Wapping Wall where the path heads by the Metropolitan Wharf building, photo 35, typical of many such converted warehouses in the area. Another short stretch of riverside walking follows as the route heads round Prospect Wharf and back up alongside the entrance to Shadwell Basin to rejoin Wapping Wall. The path crosses the Swing Bridge over the entrance to the basin, photo 36 before joining an enclosed footpath on the right that leads back down to the river.
 |
 |
 |
(37) Shadwell Basin |
(38) Lunch stop in Kemp Park |
(39) Approaching the Isle of Dogs |
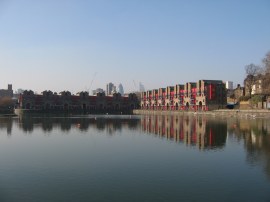
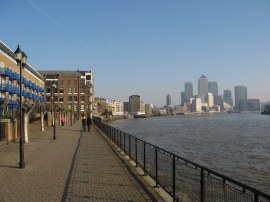
First however we made a short diversion to the left to have a look round the basin itself, photo 37. Back on course we then followed the path down to river and the King Edward V11 Memorial Park, or Kemp Park for short. Here we stopped for our lunch break on a handy waterside bench which was located next to one of the ventilation shafts for the Rotherhithe Tunnel, photo 38. I wasn't feeling that hungry but had another mug of tea and also a cup of tomato soup and hot cross bun that Sara had kindly provided. In the park there were notices attached to all the trees saying they were due to be cut down as part of proposed Thames Water Sewer works and giving details of the campaigning to save them. Having eaten we headed along the waterfront path with the office blocks of Canary Wharf growing ever closer in front of us, photo 39.
 |
 |
 |
(40) Limehouse Basin |
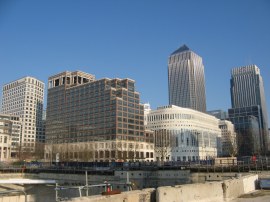
(41) View towards One Canada Square |
(42) Canary Wharf |
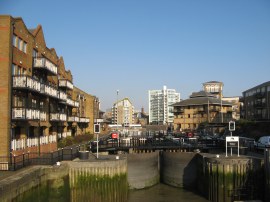
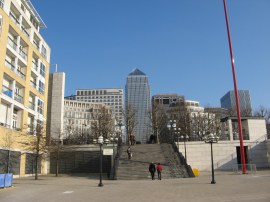
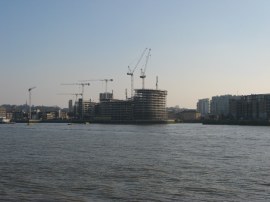
An old wharf building, which can be seen on the left hand side of photo 39, once again diverts the path back up to the road. The path then heads to the right along Narrow Street for a short distance before heading back down to the waterfront where an even shorter stretch of walkway leads up to the entrance to the Limehouse Basin, photo 40. This is a place I was very familiar with as it marks both the end point of both my walk along the River Lea from its source in Leagrave and also my walk along the Regents Canal . The route heads up some steps before crossing over the basin entrance and following the Narrow Street for a while before rejoining the river close to an old slipway. The path then heads along a welcome longer stretch of riverside path. This soon crosses a bridge over the mouth of a small inlet lined by houses before making its way down alongside the buildings of Canary Wharf, photo 42. Just past Westferry there was a large hole in the ground, looking very much like the foundations for another large office building, and is in fact the below ground works for the proposed Riverside South skyscraper development which if the current proposals are completed as planned will be one metre taller than the One Canada Square building although work on the site has currently stopped.
 |
 |
 |
(43) Deptford Creek |
(44) Burrell's Wharf |
(45) View across to Greenwich |
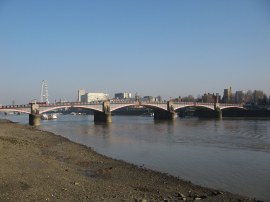
A fence lined path carries the route past the foundation hole, across one of the old entrances to the West India Docks and on along the modern houses and offices lining the river. At one point the path past an old pier where the roof was lined with Cormorants, Seagulls and a Heron. Eventually reaching Arnhem Place the path heads inland before heading to the right along West Ferry Road. The route continues ahead, past and old slipway, before turning to the right along a short stretch of road that crosses Mast House Terrace and then heads the short distance along Ferguson Close to rejoin the river. Heading on downstream there good views across the river towards Deptford Creek, photo 43, and further on down to the end of the path at Greenwich. On this bank the path passes by the remains of the SS Great Eastern's launch ramp at Millwall, the ship at the time being the largest ever built, and a little further on Burrell's Wharf, photo 44. As we approached Greenwich on the opposite bank, photo 45, we could see that the masts had been replaced on the Cutty Sark, which even at distance was looking far more impressive than when we had been there a couple of months ago.
 |
 |
 |
(46) Island Gardens, Greenwich |
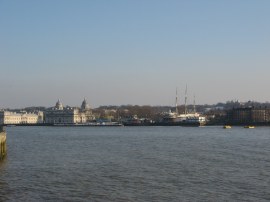
(47) Royal Naval Hospital |
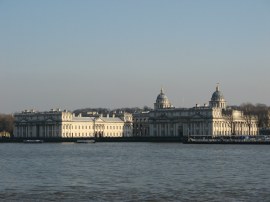
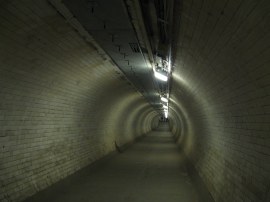
(48) Greenwich Foot Tunnel |
Reaching the end of Blasker Walk we headed up to Ferry Street which we then followed up to Island Gardens, photo 46, where we made a short detour across the park to admire the view across the river to the old Royal Naval Hospital, photo 47, before heading back to take the Greenwich Foot Tunnel, photo 48, under the river over to Greenwich where we finished this stage of the walk and more importantly the entire route of the Thames Path.
 |
 |
 |
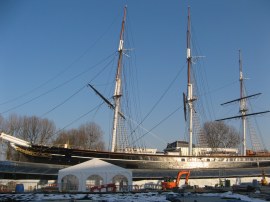
(49) Cutty Sark |
(50) Greenwich Pier |
(51) Cable Car Construction Crane |
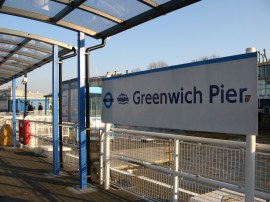
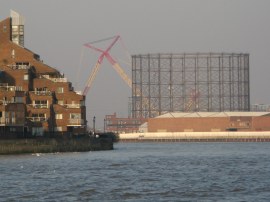
From the foot tunnel we headed up past the Cutty Sark, photo 49, to Greenwich Church Street where we began our journeys home, Sara heading off to the train station and myself heading down to Greenwich Pier, photo 50, from where I took the waterboat service back up to Tower Bridge, a convenient way to head back to town given that the DLR was not running up to Stratford. While I was on the pier I spotted the red and yellow arms of a giant crane that is involved in the construction of the Thames Cable Car, photo 51, towering over the river downstream.
As usual I have uploaded the route of the walk which can be accessed here: Thames Path North Bank part 2.
Reaching Greenwich we had walked a further 14.7 miles. This had been another pleasant walk through central London with lots to see and a fair amount of contrast between the start, middle and end sections of the walk. From Tower Bridge onwards much of the route had been more enjoyable than the path along the South bank of the river, definitely better than I had been expecting. We also couldn't have chosen a better day for the walk with the bright crisp weather to finally end our walk along the Thames Path. Next up the River Avon Walkway followed by the Kennet and Avon Canal!
 |
 |
 |
(52) Burghers of Calais Monument |
(53) Big Ben |
(54) The Monument |
If you would like to comment on this walk you can do so here:
![]() Back to:Main index page
Back to:Main index page
| ©2012 Bertuchi.co.uk. Please contact me using the email button on the right if you have any questions or comments regarding the site. Any feedback and additional information about places of interest on the walks is always welcomed. All rights reserved. Please contact me if you want to use any of the images or information from the site. ENJOY YOUR WALKING |
|