The Thames Path North Bank
Other Links >>> |
|
THAMES PATH - NORTH BANK Part 1
Teddington to Wandsworth
|
|
The Thames Path North Bank |
Between Teddington and Greenwich the Thames Path runs along both the South and North banks of the river. For our main walk myself and Sara walked along the south bank of the river which is the route the old towpath took out of London and also has generally better access to the waterfront. However having completed the main path we also decided to walk the North Bank stretch of the path through London and thus a grey and blustery winters day so us meeting up at Teddington station before walking down to join the Thames Path by Teddington Lock which marks the point where the path along the North Bank starts.
 |
 |
 |
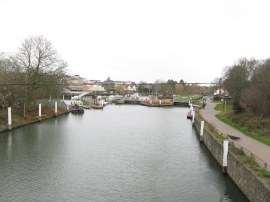
(1) The start of the path |
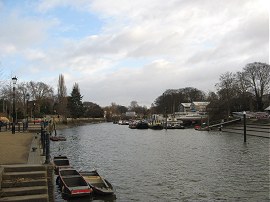
(2) View down to Teddington Lock |
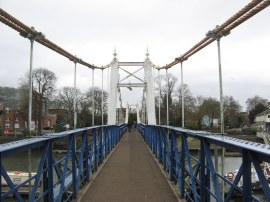
(3) Teddington Lock Footbridge (West) |
Reaching the river we crossed over to the South Bank to the sign marking the point where the two routes diverge, photo 1, having walked just over 3/4 of a mile from the station. We then headed back across the footbridge over the lock cut, photo 2, and then across the attractive suspension bridge over the river itself, photo 3, to reach the North Bank of the river.
 |
 |
 |
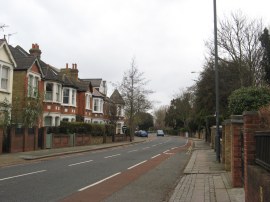
(4) Twickenham Road, TW11 |
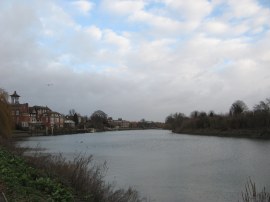
(5) River Thames by Radnor Gardens |
(6) Path opposite Eel Pie Island |
Here the route heads away from the river, a short distance up Ferry Road, before turning right along Manor Road. This is followed into Twickenham Road and then becomes Strawberry Vale photo 4 as the road is followed for some distance down towards Twickenham. The river remains hidden behind houses with only a short diversion through Radnor Gardens giving views across the Thames, photo 5. Leaving the gardens the route continues along the road, now called Cross Deep which is followed up to King Street in the centre of Twickenham. Here the route heads right and then soon right again down Wharf Lane which leads to the Embankment and a stretch of waterfront path running alongside Eel Pie Island, photo 6.
 |
 |
 |
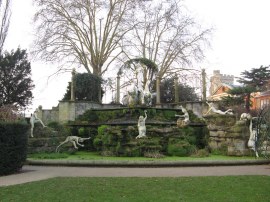
(7) Italian Fountain, York House |
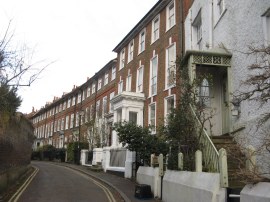
(8) Sion Road, TW1 |
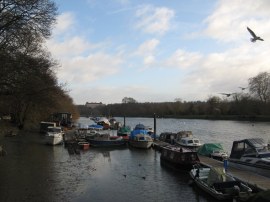
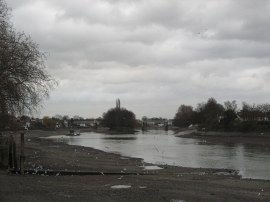
(9) View down river from Orleans Gardens |
This stretch of path leads to a road called the Riverside but first we made a short detour to visit the Italian Fountain in what were once the gardens of York House, photo 7, but is now a small public park. The statues surrounding the fountain, now known as the Naked Ladies, depict eight Oceanids and a pair of aquatic horses. They were carved in the fin de siècle style from white Carrara marble and probably came from Italy in the late nineteenth century or very early twentieth century. We then continued on along the Riverside, passing the attractive buildings of Sion Road, photo 8. The route is now running along the waterfront again as the path enters Orleans Gardens with the buildings of Richmond gradually coming into view downstream on the opposite bank, photo 9.
 |
 |
 |
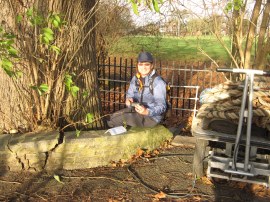
(10) Sara finds a Geocache |
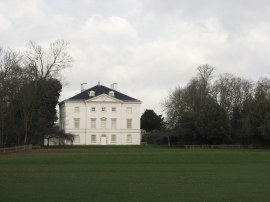
(11) Marble Hill House |
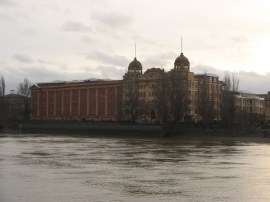
(12) Royal Star and Garter Home |
The route heads along a broad path besides the park where we stopped briefly as Sara tracked down a Geocache, photo 10. Looking across the river we could just make out the statue of Old father Thames outside Ham House before we headed past Marble Hill House, photo 11, which is a Palladian villa built in 1724-1729 for Henrietta Howard, Countess of Suffolk, the mistress of King George II. We then headed on, following the river as it curves round towards Richmond with the Royal Star and Garter Home prominent on the skyline above the Petersham Meadows, photo 12. Once again we were under the main flight path into Heathrow and there was a continuous stream of planes flying overhead.
 |
 |
 |
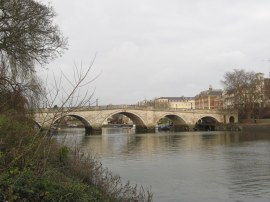
(13) Richmond Bridge |
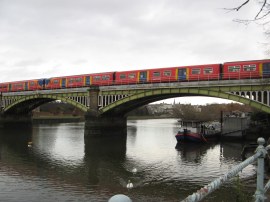
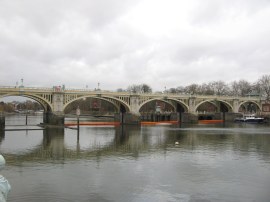
(14) Richmond Rail Bridge |
(15) Richmond Lock and Footbridge |
Reaching Richmond Bridge, photo 13, the route heads inland slightly, crossing the road and then heading down Ducks Walk. This path gradually heads back down to the river before passing under the arches of the Richmond rail bridge, photo 14, which was soon followed by the Twickenham Road Bridge. The Thames Path then follows the waters edge as the route heads alongside Ranelagh Drive to the Richmond Lock and pedestrian footbridge, photo 15, where the route links up with that of the Capital Ring. The Richmond lock and weir complex was built in 1894 by the Thames Conservancy to maintain a navigable depth of water upstream of Richmond. This then ensures that there is always at least a 1.72m depth of water in the River between Richmond and Teddington. When we had walked the South Bank path it was near high tide but today the tide was much lower and there was a noticeable difference in the height of the water either side of the weir.
 |
 |
 |
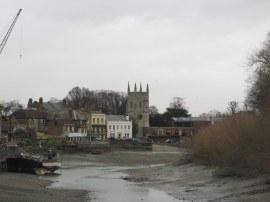
(16) View towards Old Isleworth |
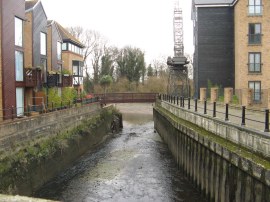
(17) Duke of Northumberland's River |
(18) Path in Syon Park |
The path then continues along the Isleworth Promenade with Isleworth Ait coming into view in the middle of the river. This section of path is often prone to flooding although there was no danger of that when we went by. Reaching a collection of houseboats the path has to once again leave the river, heading up Rail Road before turning to the right down Richmond Road, crossing over the Crane River. A little earlier we had seen a noticeboard for the River Crane walk which is a path that I believe never got fully completed; much of the route on the board was marked as a proposed route. Richmond Road is followed up to a roundabout where route heads to the right along Lion Wharf road to regain the waterfront from where there were pleasant views down besides Isleworth Ait to Old Isleworth, photo 16. The path then heads past an office block and through the garden of the Town Wharf pub before passing some new housing and a tall crane to reach the mouth of the Duke of Northumberland's River, photo 17. Here the path heads up alongside the river before turning to the right along Church Street. This road heads back towards the river by the London Apprentice pub before bending round to the left just past Isleworth Church. Here the Thames Path joins a path running alongside a long brick wall through the grounds of Syon Park, photo 18.
 |
 |
 |
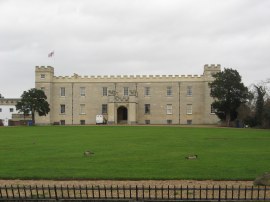
(19) Syon House |
(20) Grand Union Canal, Brentford |
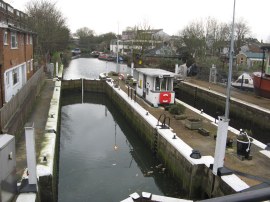
(21) Thames Lock |
The path heads past Syon House, photo 19, home of the Duke of Northumberland and continues on to a car park and the Syon Park Garden Centre. We paid a brief visit to the garden centre to use the toilets before rejoining the path as it runs across the end of the car park to join a driveway that curves round to the left up to the A315 London Road in Brentford. Here the Thames Path heads to the right and soon crosses a bridge over the Grand Union Canal. A short distance further on the route heads to the right down The Ham. This road is followed round to the left and immediately after passing under an old railway bridge the route joins the towpath running alongside the canal. This leads up and over a bridge across the canal with the route then heading down a flight of concrete steps to join the short stretch of towpath, photo 20, leading up to the Thames Lock, photo 21, which marks the junction of the Grand Union Canal and River Thames.
 |
 |
 |
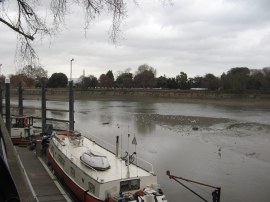
(22) View to the Thames |
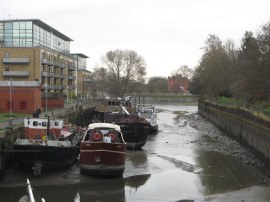
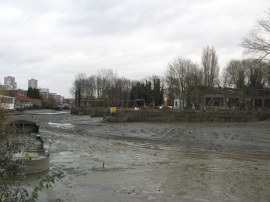
(23) Mouth of the River Brent |
(24) Lot's Ait |
The path climbs up besides the lock and then heads to the left across the canal, following Dock Road between the boatyards up to Brentford High Street. It was low tide only the waters of the river Brent flowing out to the Thames in the bottom of the channel below the lock, photo 22. Unfortunately disaster struck as Sara tripped over a low chain fence lining the road and fell, breaking her camera which she had out to take a photo. Luckily Sara herself escaped with a cut knee and bruising and was able to continue the walk, for a split second I had envisaged much worse consequences as it was quite a tumble. The route heads just a few yards along the High Street before once again turning to the right along a path that leads back down to the Thames again, running alongside the other side of the boatyard passed on Dock Road. Reaching the mouth of the Canal / River Brent, photo 23, the route heads round a small dock from where there were views over to Lot's Ait, photo 24; the channel between the island and blank completely empty of water. Leaving the small dock the path heads then along Goat Wharf back up to the High Street once again.
 |
 |
 |
(25) Watermans Park |
(26) Kew Bridge |
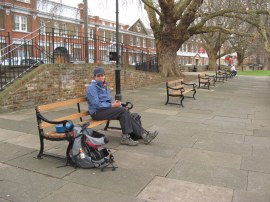
(27) Lunch stop by Kew Bridge |
As with previously, the High Street is only followed for a very short distance before the route heads back down the river besides an office to join a paved section of path running opposite Brentford Ait. This soon leads into narrow Watermans Park, photo 25. Reaching the end of the park the route briefly rejoins the road before joining a waterfront path that is followed up to Kew Bridge, photo 26. Once under the bridge the path reaches a small area of gardens with a few benches where we stopped for our lunch break, photo 27. This spot was opposite Kew Pier which is where we had stopped for our lunch while walking along the South bank.
 |
 |
 |
(28) View towards Oliver's Island |
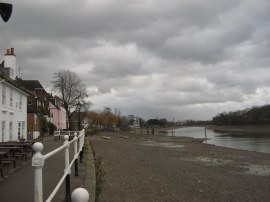
(29) Strand on the Green |
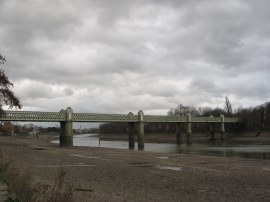
(30) Kew Rail Bridge |
We didn't stop long for lunch though as it soon felt cold in the strong wind, despite the comparatively mild temperatures for December, and everything looked rather gloomy with the thick grey clouds and almost empty river, photo 28. Reaching the end of the small gardens the Thames Path heads along the Strand on the Green, an attractive row of waterfront properties lining the river, photo 29. This is another section of the path that is prone to flooding and all the houses had rails attached to either side of their doors and windows in which boards could be placed to hold back any floodwaters. The Strand is followed under Kew Rail Bridge, photo, 30, before eventually reaching Grove Park Road where the route diverts away from the river at the start of a reasonably log stretch road walk.
 |
 |
 |
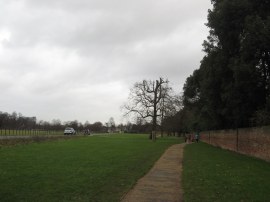
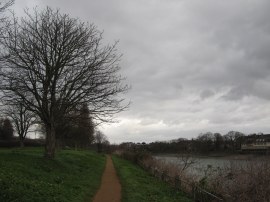
(31) Path alongside Dukes Meadows |
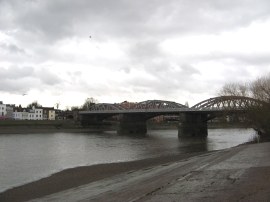
(32) Barnes Rail Bridge |
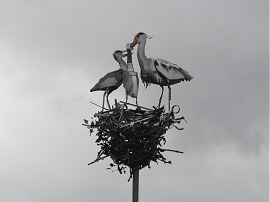
(33) Heron Sculpture |
Grove Park Road is followed into Hartington Road before the route finally heads down to the right alongside the houses of Chiswick Quay to briefly rejoin the river. The route heads to the left, crossing over the lock gates at the entrance to the marina before heading along a path that leads up to Ibis Lane which soon leads back up to Hartington Road. This is followed up to the A316 Great Chertsey Road when the route heads to the right down to Chiswick Bridge. After heading under the bridge the route joins another thin stretch of greenspace running along the river with the allotments and playing fields of Dukes Meadows away to the left on the other side of Dan Mason Road although these generally remained out of view as the path runs below the top of a small bank, photo 31. As the path approaches the Barnes Rail Bridge, the route joins Dan Mason Road which is followed up to a small bridge under the railway lines before the heading to the right along Riverside Drive which leads back to the waterfront. Here the route turns to the left, heading past the front of a rowing club from where photo 32 was taken, looking back to the rail bridge. The Thames path then heads along another green strip, running alongside the Riverside Drive with more playing fields away to the left. Just before the path reaches the end of the playing fields we passed a sculpture of a nest of herons, photo 33, sitting on top of a pole.
 |
 |
 |
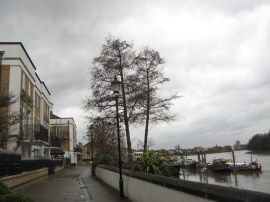
(34) Thames Path, nr Chiswick Pier |
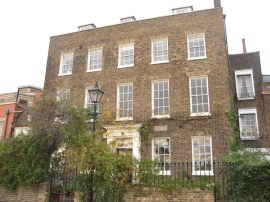
(35) Kelmscott House, Hammersmith |
(36) Approaching Hammersmith Bridge |
Reaching the end of the green space the Thames Path joins a waterside path running besides a series of small blocks of flats, photo 34. The path heads past Chiswick Pier before heading briefly to the left to join Chiswick Mall. Here the path heads by a number of fine houses, each with a small patch of garden between the path and the river. By this point the tide in the river had turned and the Thames was filling up fast either side of Chiswick Eyot. Reaching the end of Chiswick Mall the route heads briefly inland between houses before once again joining a waterfront path in Upper Mall. Towards the end of Upper Mall the path passes Kelmscott House, photo 35, which was the London home of William Morris from April 1879 to his death in October 1896. Earlier on our walk along the Thames Path on day three we had past Kelmscott Manor where William Morris also lived and after which this house was named. Leaving the Upper Mall the route hen heads along a small passageway which leads to Lower Mall. This runs across the bottom of Furnival Gardens and then alongside houses and an area of houseboats up to Hammersmith Bridge, photo 36.
 |
 |
 |
(37) Harrods Furniture Depository |
(38) Fulham Football Club |
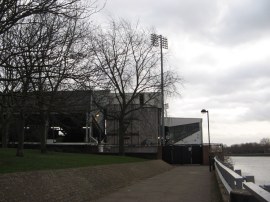
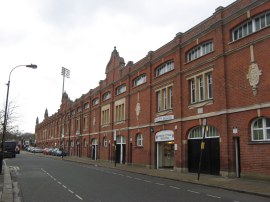
(39) Fulham Football Club |
Lower Mall continues for a few yards past the bridge before the Thames Path heads up Queen Caroline Street and then heads right into Crisp Street. Here the path passes the Riverside Studios where we once again stopped briefly to use their toilets. The path then heads to the right down besides the Studios back to the waterfront, the old Harrods Furniture Depository, photo 37, standing tall on the opposite bank. Reaching an old wharf the route heads briefly to the left up to Rainville Road. The Thames Path then passes the Crabtree Tavern and heads to the right down besides the pub gardens. Reaching a back street we crossed diagonally to the right to join a path running along the riverside, curving round a block flats to join the main waterfront path. There was a Thames Path way mark on this stretch of path although somewhat confusingly there was also a Thames Path signpost directing the route back to the river along the left hand side of the flats as well. The next stretch of waterfront path is followed down to Fulham Football Club, photo 38, and on the way Sara stopped and found another geocache hidden besides the path. Reaching the edge of the football stadium, where the statue of Michael Jackson was clearly visible, the path heads to the left up to Stevenage Road before heading to the right along the front of the ground, photo 39, where there was a much more appropriate statue of Johnny Haynes.
 |
 |
 |
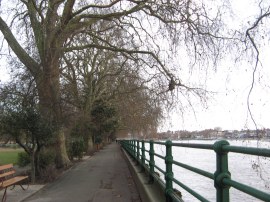
(40) Bishops Park |
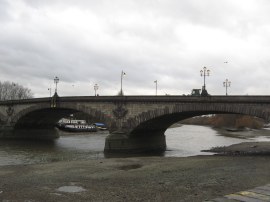
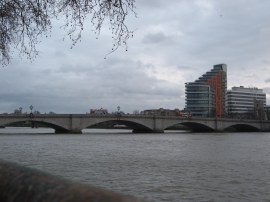
(41) Putney Bridge |
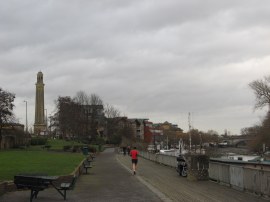
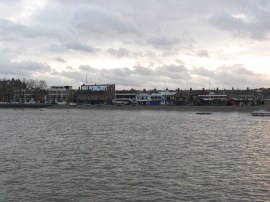
(42) View across to Putney Embankment |
Reaching the far side of the football ground the path heads to the right into Bishops Park, following a path that heads alongside the stands back to the river. The route then continues along a path lined with tall Plane Trees, photo 40, as it makes its way downstream towards Putney Bridge, photo 41. On the opposite bank we could see the spot where the Beverley Brook reaches the Thames and a short distance further downstream all the boat houses lining the Embankment, photo 42.
 |
 |
 |
(43) Hurlingham Park |
(44) Building, Broomhouse Lane SW6 |
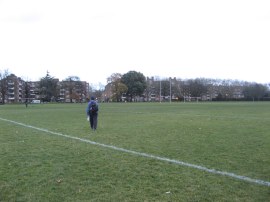
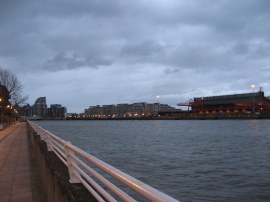
(45) Heading towards Wandsworth Bridge |
The Thames path runs by the grounds of Fulham Palace and heads through a short tunnel under Putney Bridge up towards the Putney Rail Bridge where the path starts a significant detour away from the river. Here the path heads up besides the railway to Ranelagh Gardens, by Putney Bridge Station, before heading to the right along the road and then to the left up Napier Avenue to Hurlingham Road. Here the route heads right before heading into the grounds of Hurlingham Park. Here we followed a tarmac track for a short distance before bearing diagonally to the right across the grounds of the park, photo 43, as we made our way over to Broomhouse Lane. The light was fading fast as we made our way down the road, photo 44, back to the river. Here we headed downstream for a short while before another brief diversion up to Carnwath Road around an empty plot of land, before rejoining the waterfront path, photo 45, which we followed down to Wandsworth Bridge.
 |
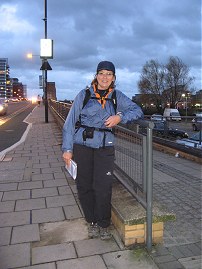 |
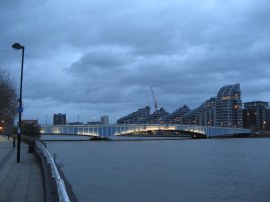
(46) Wandsworth Bridge |
(47) Sara, Wandsworth Bridge |
Reaching Wandsworth Bridge, photo 46, we ended our walk for the day having walked 16.23 miles along the Thames Path from Teddington Lock. As we arrived at the bridges there was a large flock of Starlings getting ready to roost wheeling about over the bridge, a sight I seldom see. After a quick photo to mark the end of the stage, photo 47,we then crossed the bridge over the river and made our way over to Wandsworth Station to start our journeys home.
As usual I have uploaded the route of the walk which can be accessed here: Thames Path North Bank part 1.
Reaching the end of the walk we had walked just over 17.5 miles for the day. I had enjoyed this walk a lot more than I had been expecting with the detours away from the river not too intrusive and some quite attractive sections of path alongside the Thames. Hopefully it won't be too long before we can walk the next stretch of path back to Greenwich.
If you would like to comment on this walk you can do so here:
![]() Back to:Main index page
Back to:Main index page
| ©2012 Bertuchi.co.uk. Please contact me using the email button on the right if you have any questions or comments regarding the site. Any feedback and additional information about places of interest on the walks is always welcomed. All rights reserved. Please contact me if you want to use any of the images or information from the site. ENJOY YOUR WALKING |
|