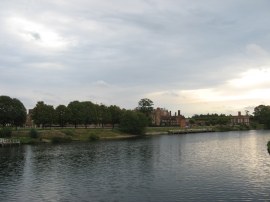
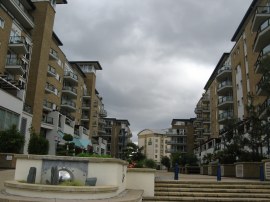
(1) View over to Hampton Court Palace
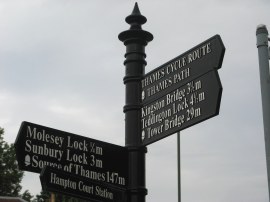
(2) Trail distance marker
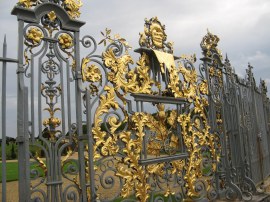
(3) Fence surrounding Hampton Court Palace
Other Links >>> |
|
THAMES PATH - Part 11
Hampton Court to Battersea
Myself and Sara did this stage of our walk along the Thames Path on Saturday 10th September 2011. I took the train from Vauxhall over to Hampton Court station, meeting up with Sara who joined the train at Clapham Junction. Once at Hampton Court it was just a few yards over to Hampton Court Bridge which is where we had finished the previous stage of the walk a few weeks earlier. It was a very grey and gloomy day with only the odd break in the clouds however we were only caught in one short shower and it was surprisingly mild.
|
|
|
|
(1) View over to Hampton Court Palace |
(2) Trail distance marker |
(3) Fence surrounding Hampton Court Palace |
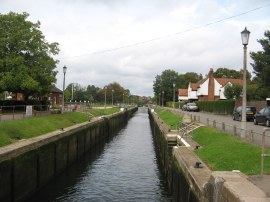
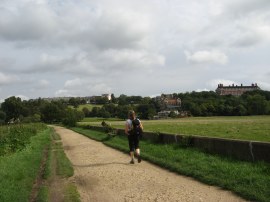
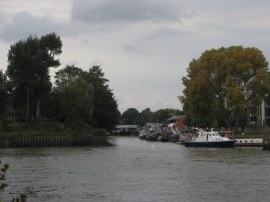
After grabbing a Danish pastry from the very good station cafe we then headed across Hampton Court Bridge from where there were good views over to Hampton Court Palace, photo 1, and the path we would soon be walking down. Reaching the end of the bridge was a Thames Path sign, photo 2, which gave a distance of 147 miles to the source of the river; I think this is the first sign showing the total distance of the path since the sign at the very start. The path then heads down besides the palace although any decent views were rather obscured either by walls or a double metal fence, photo 3.
 |
 |
 |
(4) Approaching Kingston |
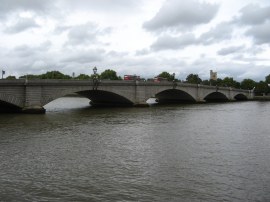
(5) Kingston Bridge |
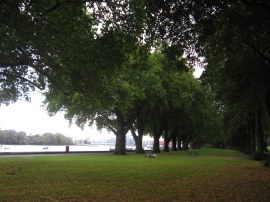
(6) Canbury Gardens |
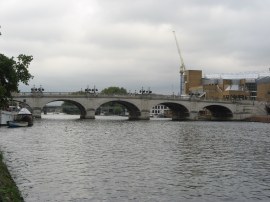
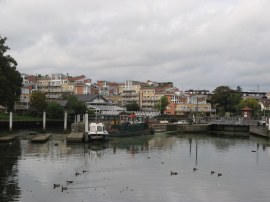
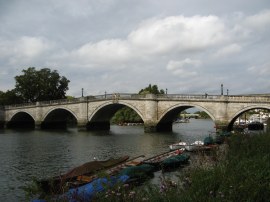
From the buildings of Hampton Court Palace the route follows a good path that follows the river as it curves round the extensive palace grounds with the buildings of Thames Ditton on the opposite bank. The path heads by Thames Ditton Island and then Ravens Ait as we headed on towards Kingston upon Thames, photo 4. The towpath crosses Kingston Bridge, photo 5, briefly linking up with the London Loop which also crosses the river at this point before joining the path on the opposite bank as it heads by the cafe's and shops of Kingston town centre. A short distance further on the route heads under a rail bridge and into Canbury Gardens, photo 6.
 |
 |
 |
(7) River Thames nr Kingston |
(8) Heron |
(9) Teddington Lock - 41 |
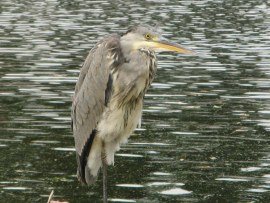
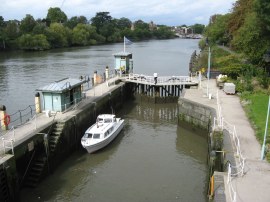
The towpath makes its way through the gardens up to join Lower Ham Road, passing a rowing club where there were numerous pairs of shoes lined up along the water edge. From here there were good views downstream as the river starts curving round to Teddington Lock, photo 7. Leaving the road the towpath then heads alongside a strip of open land running alongside Ham. There were a number of boats moored along the river bank and on one of these Sara spotted a Heron standing motionless looking out over the river, photo 8. Not much further on we reached the weir across the river and followed a short cut down alongside an island to reach the Teddington Lock which is actually a complex of three locks and some boat rollers, photo 9. Here we crossed over to the island between the main lock and barge lock and had a short snack break sitting on a bench, over looking the buildings of Teddington on the opposite bank. There was not much traffic on the river although one boat did pass through the lock while we were sitting there and it was quite surprising to see just how quickly the lock filled. At Teddington Lock the Thames path splits into two with routes along both North and South banks between here and Greenwich. For this walk we have decided to follow the South bank as it seems more scenic and the path follows the river much more closely than on the other bank although doubtless I will walk the northern sections at some point.
 |
 |
 |
(10) The Barge Lock at Teddington |
(11) Path alongside Ham Lands Nature Reserve |
(12) Site of the Hammerton's Ferry |
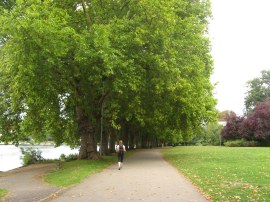
After our break we crossed back over the lock gates of Barge Lock, photo 10, back to the river bank. The Barge Lock is the largest lock on the river at 650 feet long and holds 1.75 million gallons of water. Although we still had one more lock to pass Teddington Lock marked a significant milestone in our walk as below the lock and weir we were now on the tidal stretch of the Thames. The area of green space besides the river broadens as the path heads alongside the Ham Lands Nature Reserve although the dense greenery besides the path, photo 11, limited views of both the river and surroundings for much of this stretch although the views did open up briefly alongside Eel Pie Island. Not far below the lock we passed a small monument enclosed behind some metal railings which marks the boundary point between the Port of London Authority, which is the navigation authority downstream, and the Environment Agency, which is the navigation authority upstream. As we began to near Richmond the path heads past the entrance to Ham House, which is situated a little back from the river, where we could just make out another statue of Old Father Thames in the gardens. On the opposite bank was the large Marble Hill House, the two sites linked by the Hammerton's Ferry, photo 12.
 |
 |
 |
(13) Approaching Richmond |
(14) Petersham Meadows |
(15) Richmond Bridge |
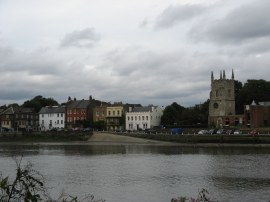
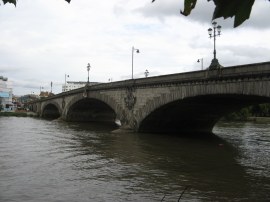
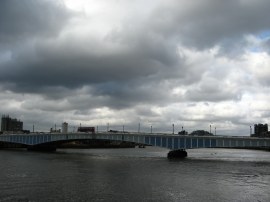
For much of this part of the walk we were under the flight path of planes coming in to land at Heathrow Airport and there was a steady stream of planes crossing overhead which rather disturbed the otherwise tranquil nature of the area. Below Ham House the views open up again downstream towards Richmond, photo 13, as the path heads across the bottom of Petersham Meadows, photo 14. Reaching the end of the meadows the Thames Path links up with the route of the Capital Ring as it follows the River Thames below Richmond Hill where there are also some handy public toilets. The route heads along a broad river front path, passing another rowing club before reaching Richmond Bridge, photo 15.
 |
 |
 |
(16) Richmond Rail Bridge |
(17) Richmond Lock and Footbridge |
(18) Richmond Lock - 42 |
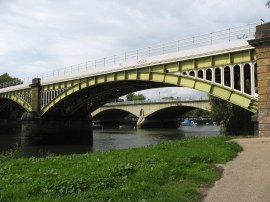
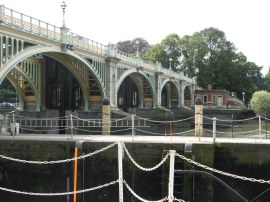
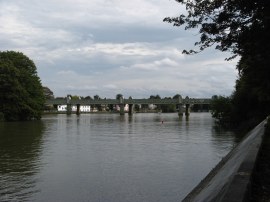
The river front was busy with people as we continued on along Cholmondeley Walk, passing under the arches of the Richmond rail bridge, photo 16, which was soon followed by the Twickenham Road Bridge. The path then heads by the open space of the Old Deer Park, much of which now forms part of the Royal Mid-Surrey Golf Club, although rather like when we were heading besides the Ham Lands Nature Reserve the vegetation alongside either side of the path restricted the views. Not much further on we reached the Richmond Lock and Footbridge, photo 17. The Richmond lock and weir complex was built in 1894 by the Thames Conservancy to maintain a navigable depth of water upstream of Richmond. For a couple of hours either side of high tide boats can pass by the sluice gates that maintain the water depth but at other times boats must use the lock, photo 18, which according to a red LED display either side of the lock costs £5 to use. The tide was coming in as we were walking although it was not quite high enough yet to allow passage through the barrage. If I have counted correctly this was the 42nd and final lock we have passed on our walk down the Thames.
 |
 |
 |
(19) View over to Isleworth |
(20) Meridian Marker |
(21) View downstream towards Kew |
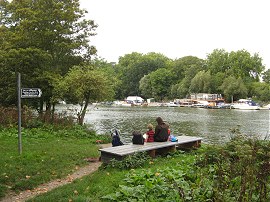
The route then continues along its tree lined path around the grounds of the Old Deer Park, running alongside the wooded Isleworth Ait, before we were able to get a view across to Isleworth Church, photo 19. The Old Deer Park was home to the Kew Observatory which was founded by King George III and as we headed along the towpath we passed a small metal marker on the towpath, photo 20, which marks the site of a Stone Obelisk was placed due North from the centre of the observatory and which is just visible on the other side of the hedge lining the path. Due to the meanders of the river in this area we had also earlier passed the corresponding stone obelisk besides the path that was placed due south of the observatory; these obelisks had been built to aid the alignment of the observatory instruments. Continuing on we were able to spot a number of tower blocks rising up in the distance, photo 21, as we made our way down towards Kew and Brentford as well as the more attractive Syon House.
 |
 |
 |
(22) Entrance to the Grand Union Canal |
(23) Kew Bridge |
(24) View down to Kew Rail Bridge |
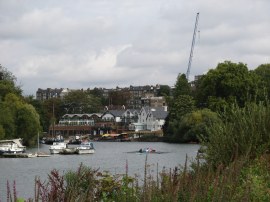
The path heads alongside Kew Gardens, and approaching Kew Palace, passes the entrance to the Grand Union Canal heading off from the opposite bank, photo 22. Next up the Thames reach Kew Bridge, photo 23, and having passed under the bridge we stopped for our lunch break on a bench by Kew Pier, not the most scenic location but it was good to have a sit down for a rest and something to eat. After lunch we headed on and soon passed under Kew Railway Bridge, photo 24, which carries both rail services and the District Line trains over the river.
 |
 |
 |
(25) Chiswick Bridge |
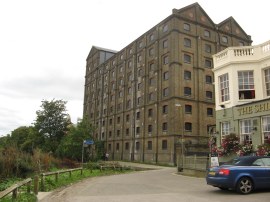
(26) Stag Brewery, Mortlake |
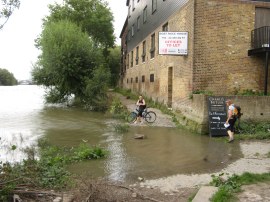
(27) Flooded section of path |
The towpath then heads by the buildings of the National Archive and a succession of modern riverside housing developments along another tree lined section of path which is followed most of the way down to Chiswick Bridge, photo 25. The route then heads along Thames Bank, past a number of large houses and the Ship Pub to reach the Stag Brewery at Mortlake, photo 26. We had been watching the incoming tide filling up the river and reaching the end of the brewery buildings we reached a small inlet, photo 27, where the water was across a low lying section of towpath, photo 27. I had my walking boots on and was able to make my way across but Sara's boots weren't waterproof so I retraced my steps, one boot getting a bit damp on the return journey, and we followed the signposted diversion up along a short section of Mortlake High Street before heading back down to the rejoin the waterside on a slightly higher section of path a little way down river.
 |
 |
 |
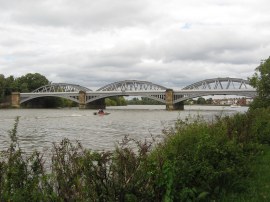
(28) Barnes Railway Bridge |
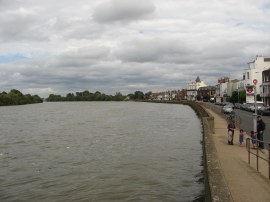
(29) View down the Thames at Mortlake |
(30) Hammersmith Bridge |
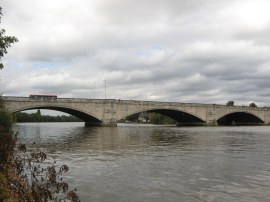
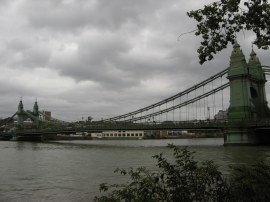
This path heads by some buildings and another riverside pub to join the pavement running alongside The Terrace at Mortlake. The towpath heads under the Barnes Railway Bridge, photo 28, and follows The Terrace as it becomes the Lonsdale Road, photo 29. Leaving the road, another tree lined section of path gradually bends its way round to reach the Hammersmith Bridge, photo 30. From the towpath there were occasional views between the trees across the river over to the waterfront buildings of Hammersmith becoming gradually nearer. While we were walking this section it started to rain however despite the rain being quite heavy it was only a short shower and the trees lining the bank provided ample protection meaning there was no need to dig out the waterproofs.
 |
 |
 |
(31) Harrods Furniture Depository |
(32) Path heading towards Putney |
(33) Craven Cottage |
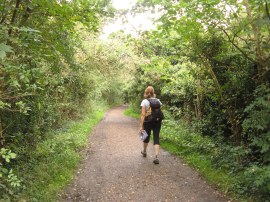
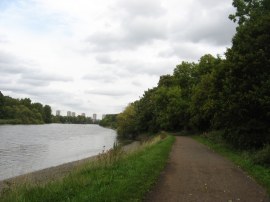
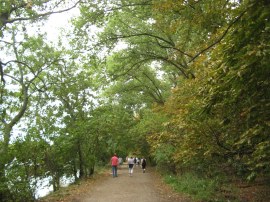
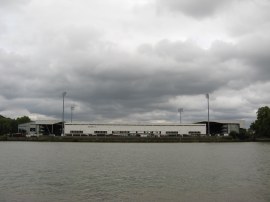
Once under the bridge the path heads by more housing and past the old Harrods Furniture Depository, photo 31, now converted into flats, a place I always remember as a landmark for the Oxford - Cambridge boat race. The Thames then curves round the edge of the Wetland Centre at Barnes although this remains hidden from view. While we were on this stretch of path we came across a family who were holding a large terrapin that they had found besides the path. I had visions of it having spent all summer breaking out of the wetlands centre only to be caught a few feet away from the river and freedom although it easily could have been a native of the river. Another tree lined section of path, photo 32, follows the river down towards Putney, passing by Craven Cottage, photo 33, home of Fulham FC on the opposite bank. The path heads alongside some playing fields and crosses over the mouth of Beverley Brook before joining the Embankment.
 |
 |
 |
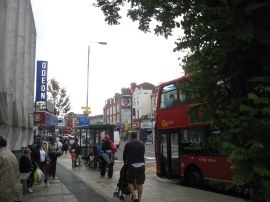
(34) Putney High Street |
(35) Putney Bridge |
(36) Wandsworth Park |
This road leads past a large number of rowing clubs lining the river up to Putney Bridge. We had originally intended finishing the days walk at Putney but we have been making good progress after our early start and thus decided to continue on downstream towards Battersea. The path briefly leaves the river at Putney Bridge, heading up the High Street for a few yards, photo 34, before heading round the back of a church to rejoin the waterfront. Here we stopped on a bench over looking Putney Bridge, photo 35, and had another short break while I eat a sandwich I brought in a nearby shop. There was another very brief shower while we were eating but this soon blew over. The waterfront here is only followed for a short distance round Putney Wharf before the Thames Path heads back inland, heading to the left along the residential Deodar Road. Here the path passes under a rail bridge and reaching the end of the road continues ahead through Blade Mews into Wandsworth Park, photo 36.
 |
 |
 |
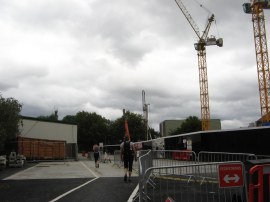
(37) Construction site nr Wandsworth Park |
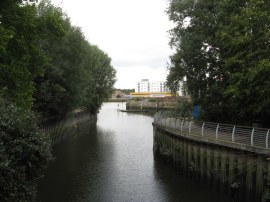
(38) Mouth of the River Wandle |
(39) Riverside Housing, Wandsworth |
Wandsworth Park provided a pleasant green interlude before we reached another area of new housing, some of which is still being built, photo 37, where once again we had to detour away from the river. We headed between building site up to Enterprise Way where a footbridge carries the Thames Path across the mouth of the River Wandle, photo 38. We then continued ahead along Smugglers Way before joining a path on the left that heads down besides the edge of a refuse centre back to the river. Another short stretch of waterfront path then headed down towards Wandsworth Bridge, passing another set of the modern blocks of flats, photo 39, that now line so much of the river on the old London industrial sites.
 |
 |
 |
(40) Wandsworth Bridge |
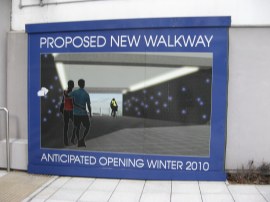
(41) Proposed Walkway site |
(42) River Thames, Battersea |
Reaching Wandsworth Bridge, photo 40, the path heads up Wandsworth Bridge Road to safely cross the road by a large roundabout before heading back down the other side of the road to some steps that lead back down to the river. At the bottom of the steps was a hoarding showing the site of a proposed new walkway under the bridge, photo 41, with an anticipated opening date of Winter 2010 which was some nine months earlier, a useful addition if it ever opens. It was then back downstream past more new housing, photo 42, to the Battersea Heliport.
 |
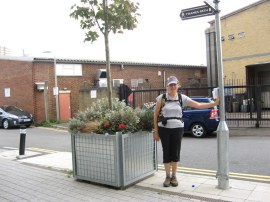 |
(43) Battersea Heliport |
(44) The end point of stage 11 |
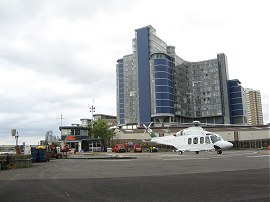
Reaching the Heliport, photo 43, we headed up between buildings to Bridge Court, photo 44, which is where we finished this stage of our walk along the Thames Path, having walked just over 19 miles from Hampton Court. From the station we then walked over to Clapham Junction station from where I had a very easy journey home after another enjoyable walk.
As usual I have uploaded the route of the walk which can be accessed here: Thames Path Stage 11 Route.
If you would like to comment on this walk you can do so here:
![]() Back to:Main index page
Back to:Main index page
| ©2012 Bertuchi.co.uk. Please contact me using the email button on the right if you have any questions or comments regarding the site. Any feedback and additional information about places of interest on the walks is always welcomed. All rights reserved. Please contact me if you want to use any of the images or information from the site. ENJOY YOUR WALKING |
|